How to Dip Nails at Home Like a Pro

Learn how to dip nails at home with easy steps, prep tips, safety advice, and ways to make your manicure last longer without salon mistakes.
A few years ago, doing dip nails at home sounded like something only nail techs could pull off.
Now?
Plenty of people are skipping expensive salon visits and learning the process themselves.
According to the American Academy of Dermatology, nail care habits and harsh nail products can affect nail health over time, which is why proper application matters so much.
You do not need a beauty license to get neat, long-lasting nails, but you do need patience and the right steps.
Learning how to dip nails at home can save you money, cut down salon appointments, and give you more control over your nail health.
If you normally search for nails near me before every event or weekend outing, doing dip nails yourself can become a handy skill to keep in your back pocket.
And once you understand the basics, you can get salon-looking nails right from your kitchen table.
What Are Dip Nails?
Dip nails are a manicure method that uses:
- A bonding liquid
- Colored powder
- Activator liquid
- Top coat
Instead of curing polish under a UV lamp like with gel nails, you dip your nails into layers of colored powder.
The result is a manicure that usually lasts longer than regular polish.
Many people like dip nails because they:
- Last about 3 to 4 weeks
- Feel stronger than regular polish
- Come in many colors
- Do not always require UV light
According to the U.S. Food & Drug Administration, proper use and sanitation of nail products are important for reducing irritation and nail damage.
What You Need for Dip Nails at Home
Before starting, gather everything first. Stopping midway with sticky nails is frustrating. Trust me on this one.
Basic Dip Nail Kit
You will need:
- Dip powder
- Base coat
- Activator
- Top coat
- Nail file
- Buffer block
- Cuticle pusher
- Nail brush
- Rubbing alcohol
- Lint-free wipes
Some starter kits already include these items.
Step 1: Prep Your Nails Properly
Good prep is the difference between nails lasting three weeks or popping off after three days.
Start With Clean Nails
Wash your hands and remove old polish completely.
Then:
- Push back your cuticles gently
- Trim nails if needed
- File nails into shape
- Buff the nail surface lightly
Do not skip buffing. Dip powder sticks better to a slightly rough surface.
Remove Dust and Oil
Use rubbing alcohol to clean each nail.
If oil stays on the nail plate, the dip powder may lift early.
Step 2: Apply a Thin Base Coat
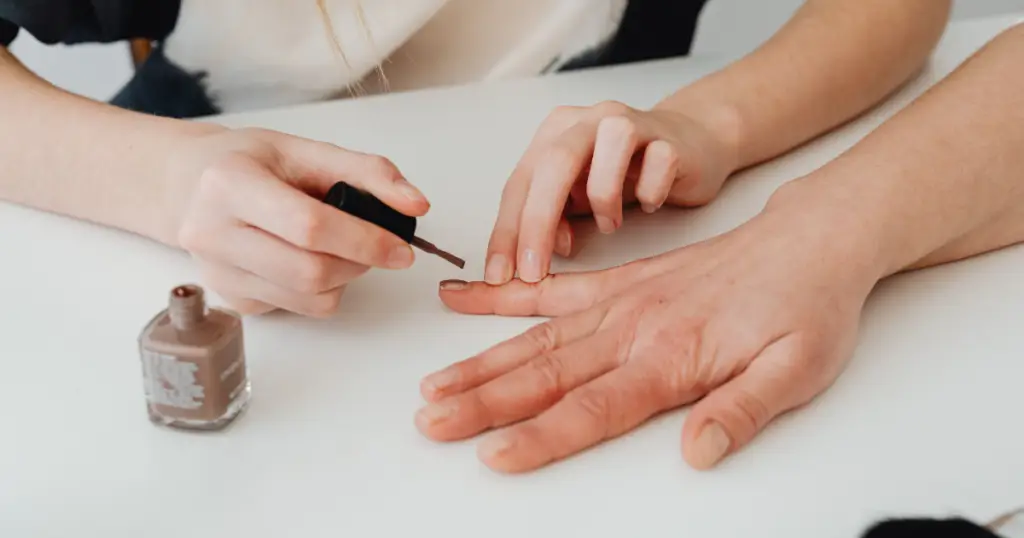
This is where many beginners mess up.
A thick base coat causes:
- Lumpy nails
- Uneven powder
- Cracking
Paint a thin layer on one nail only before dipping.
Work one nail at a time because the base dries quickly.
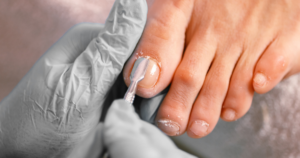
Step 3: Dip Your Nail Into Powder
After applying base coat:
- Dip your finger into powder at a 45-degree angle
- Tap off extra powder
- Use a soft brush to remove loose powder
Repeat this on every nail.
How Many Layers Should You Do?
Usually:
- 2 layers = natural look
- 3 layers = stronger coverage
Too many layers can make nails bulky.
Step 4: Apply Activator
Activator hardens the powder.
Without it, your nails stay soft and dusty.
Brush activator over every nail and wait about 2 minutes.
This step is important because it locks everything together.
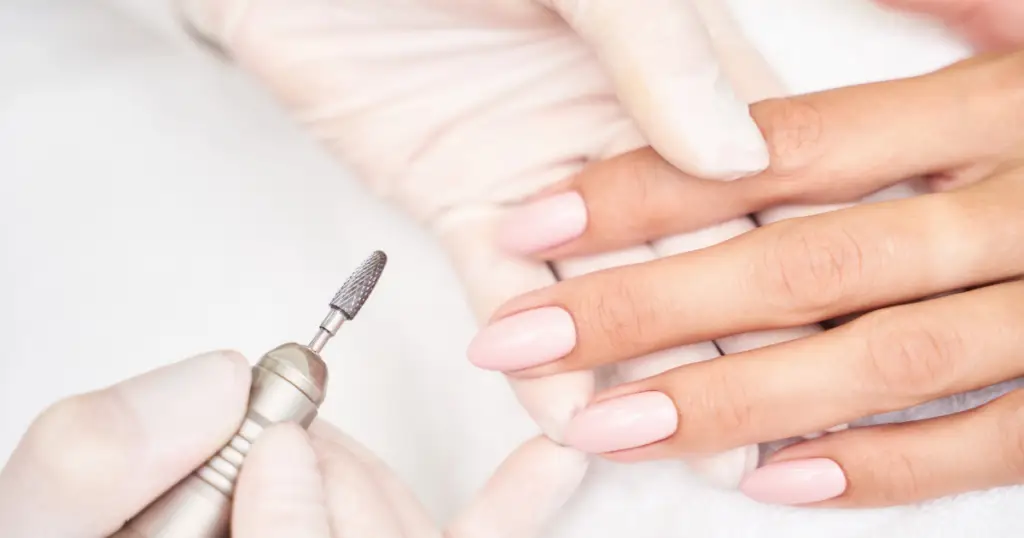
Step 5: Shape and Buff
Once dry, file the edges and smooth the nail surface.
This is where your manicure starts looking professional.
Focus on:
- Smooth edges
- Even thickness
- Rounded cuticle area
Do not over-file near your natural nail.
Step 6: Apply Top Coat
Top coat adds shine and protects the manicure.
Use quick, smooth strokes.
Usually, two thin layers work best.
Wait a few minutes between coats.
At this point, your nails should look glossy and finished.
Common Mistakes People Make With Dip Nails
Most bad dip manicures come from rushing.
Here are the biggest mistakes beginners make.
Using Thick Layers
Thick layers create:
- Bumps
- Cracks
- Uneven color
Thin coats always look better.
Skipping Nail Prep
Even expensive dip powder will not last on oily nails.
Prep matters more than people think.
Flooding the Cuticles
If product touches the skin, lifting happens faster.
Leave a tiny gap around the cuticle area.
Not Cleaning Brushes
Dip liquids can harden brushes quickly.
Wipe bottles and brushes after use.
How Long Do Dip Nails Last?
When applied correctly, dip nails usually last:
- 3 to 4 weeks
Some people even get longer wear.
Your nails may chip sooner if you:
- Wash dishes without gloves
- Use nails to open cans
- Skip proper prep
If you already spend money searching for a Nail salon near me every few weeks, home dip nails can help stretch your beauty budget a bit further.
Tips to Protect Your Natural Nails
- Do not peel dip powder off
- Moisturize cuticles daily
- Use acetone carefully
- Take breaks between sets
Healthy nails matter more than trendy nails.
How to Remove Dip Nails at Home
Removal is where many people damage their nails.
Peeling dip nails off can also remove layers of your natural nail.
Safe Removal Method
Here is the safer way:
- File off the shiny top coat
- Soak cotton balls in acetone
- Wrap nails with foil
- Wait 10 to 15 minutes
- Gently scrape softened product away
Do not force stubborn spots.
You may need another short soak.
Best Tips for Salon-Looking Dip Nails
After enough trial and error, these small tricks make a huge difference.
Use Good Lighting
Bad lighting hides uneven spots.
Natural daylight helps most.
Keep Layers Thin
Thin layers cure better and feel lighter.
Work Slowly
Rushing almost always leads to messy nails.
Practice on One Hand First
Your dominant hand usually does better work.
The other hand may look slightly chaotic at first. That is normal.
Can Beginners Really Do Dip Nails at Home?
Absolutely.
Your first attempt may not look perfect. Mine definitely did not.
One thumbnail looked oddly shaped for almost two weeks, and I spent half the evening brushing off the table’s powder.
But the learning curve gets easier quickly.
The key is:
- Patience
- Thin layers
- Good prep
- Safe removal
Once you get comfortable, you may even stop searching Dip Nails Near Me every other weekend.
Extra Care Tips After Your Dip Manicure
To keep nails looking fresh:
- Apply cuticle oil daily
- Wear gloves while cleaning
- Avoid biting nails
- Do not use nails as tools
Even the best manicure needs some care.
And if your feet need attention too, pairing your manicure with a quick Pedicure Near Me appointment every now and then can help keep everything looking polished without doing every beauty task yourself.
Conclusion
Learning how to dip nails at home takes practice, but it is much easier than many people think.
The biggest difference between a messy manicure and a clean one usually comes down to patience and prep work.
Once you learn the process, you can save money, control the products used on your nails, and enjoy salon-style results from home.
Some sets will turn out amazing. Some may look a little questionable at first. That is part of learning any beauty skill.
Stick with thin layers, protect your natural nails, and avoid rushing the removal process. Your nails will thank you later.